

How To Configure Load Balancer In Windows Server 2016
In this article, nosotros will run into the steps to the Network Load Balancing (NLB) feature in Windows Server 2019. Nosotros can use NLB to manage two or more servers as a single virtual cluster.
What is NLB (Network Load Balancing) in Windows Server 2019?
The Network Load Balancing (NLB) distributes traffic across several servers by using the TCP/IP networking protocol. Past combining 2 or more computers that are running applications into a unmarried virtual cluster, NLB provides reliability and functioning for web servers and other mission-critical servers.
Windows Server 2019 NLB cluster can support upwards to 32 Servers in a unmarried NLB cluster. The servers in an NLB cluster are called hosts, and each host runs a divide copy of the server applications.
NLB distributes incoming client requests across the hosts in the cluster. You tin configure the load that is to be handled by each host.
Agreement Test lab:
For this, we will employ the virtual exam lab created in VirtualBox.
- WS2K19-DC01: Domain Controller and DNS
- WS2K19-SRV02: Member Server
- WS2K19-SRV03: Member Server
Install the Network Load Balancing feature on Server 2019:
Note: We demand to perform the following steps on both member servers that are going to participate in the NLB cluster.
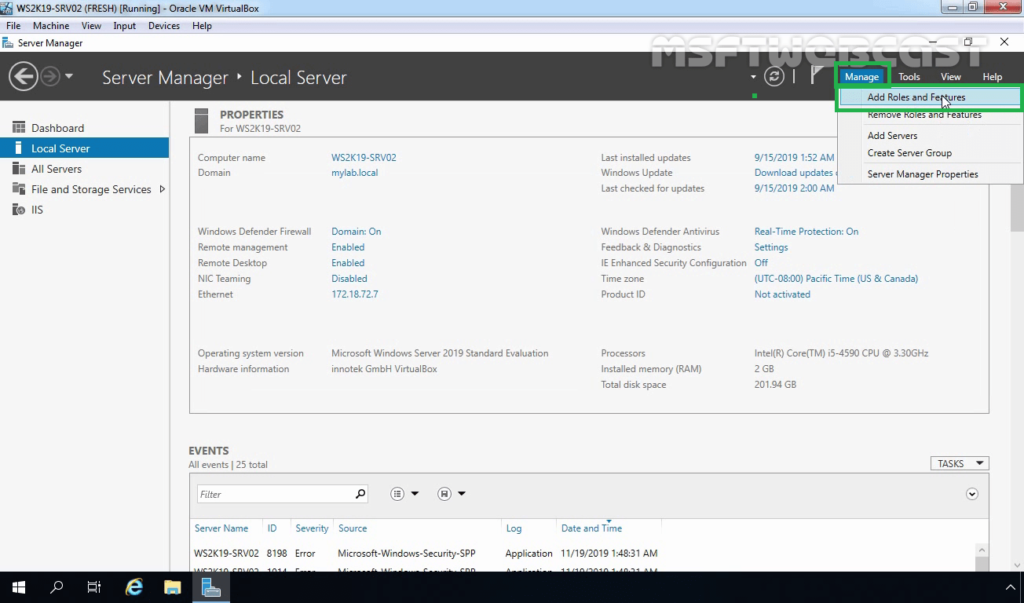
i. On Fellow member Server, open Server Managing director. Click on Tools and select Add Role and Features.
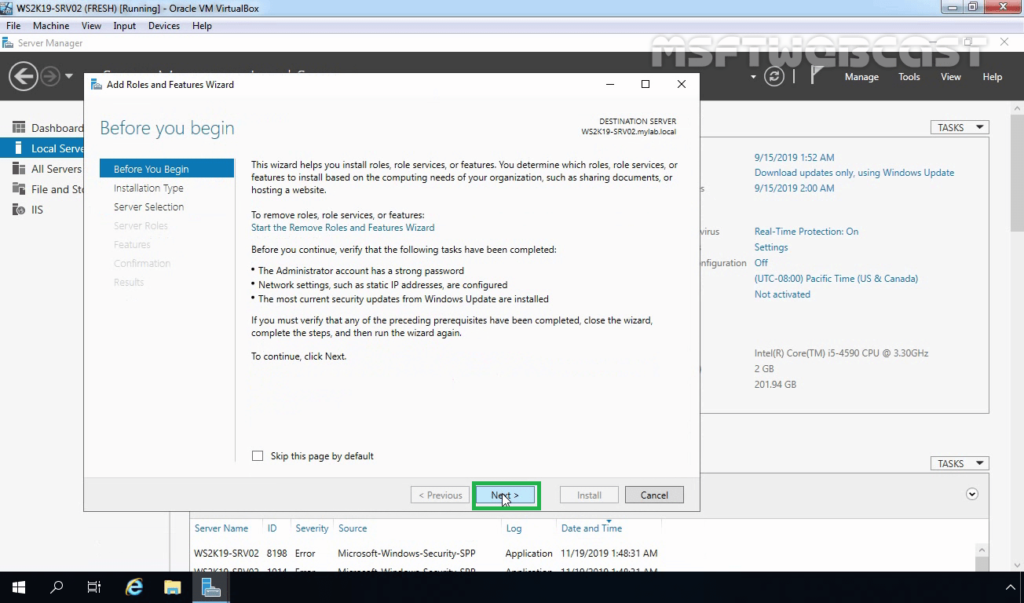
ii. On the Earlier yous begin page, click Next.
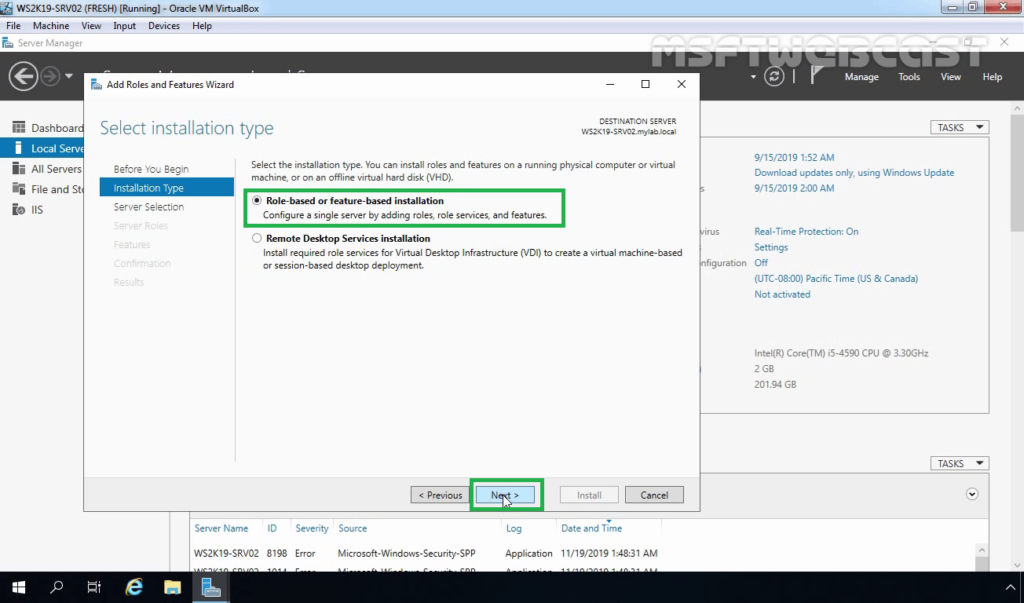
three. Select Part-based or feature-based installation and click Next.
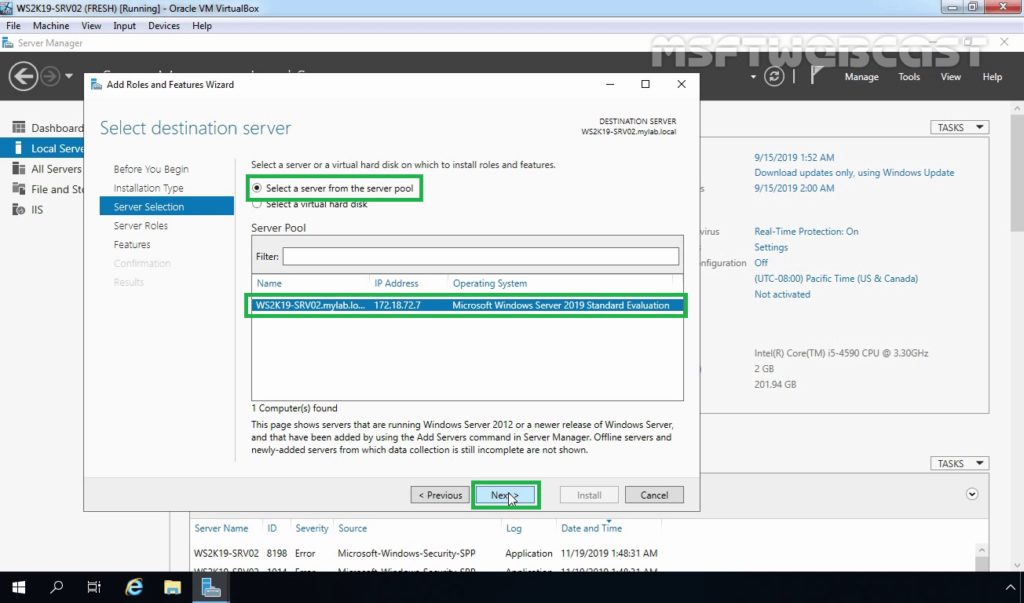
four. Select a server from the server pool on which yous want to install the Network Load Balancing feature, click Side by side.
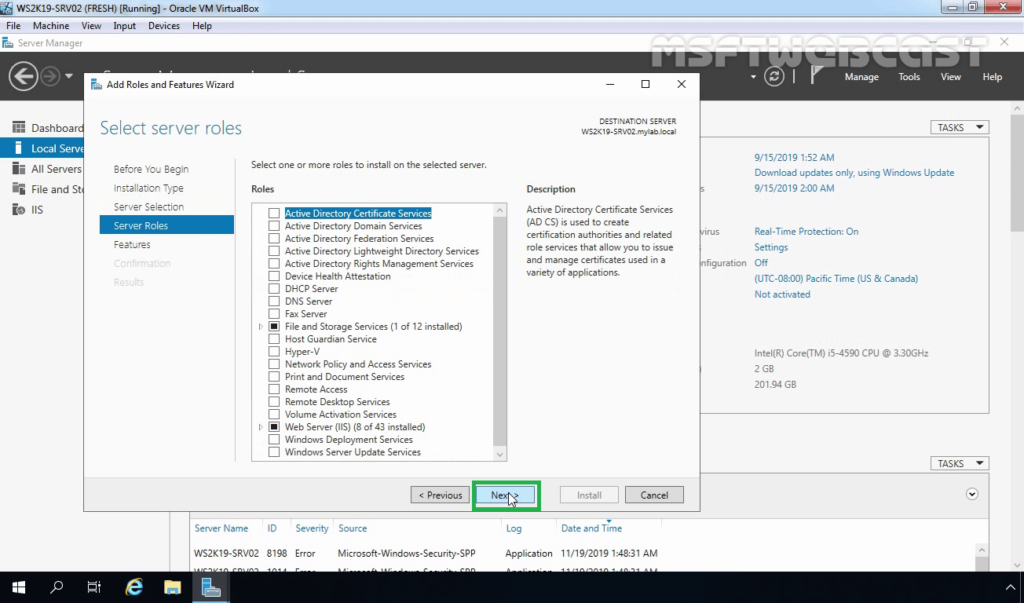
5. On select server roles page, click Next.
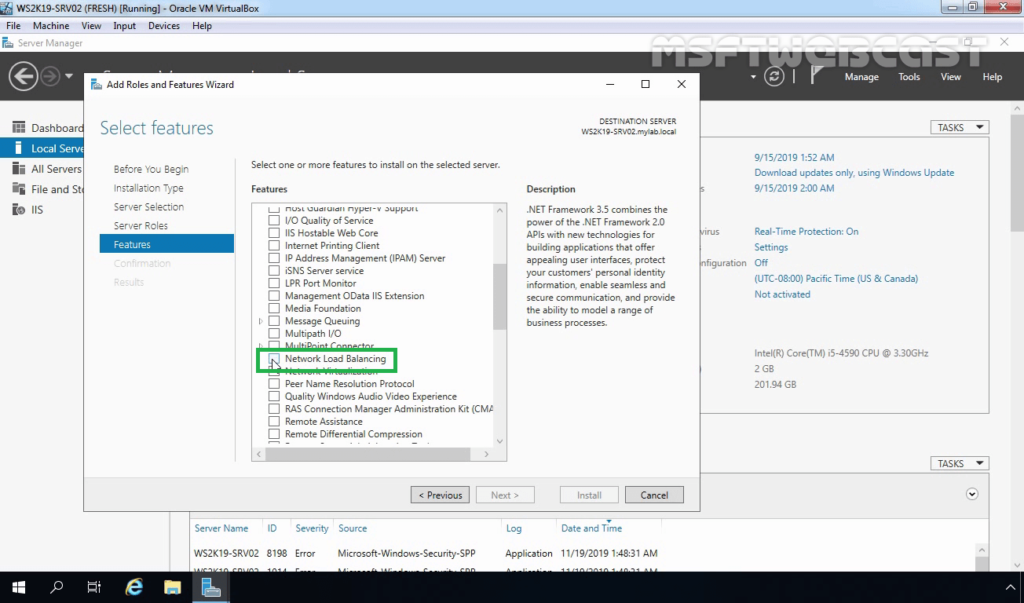
6. On select features, select Network Local Balancing checkbox.
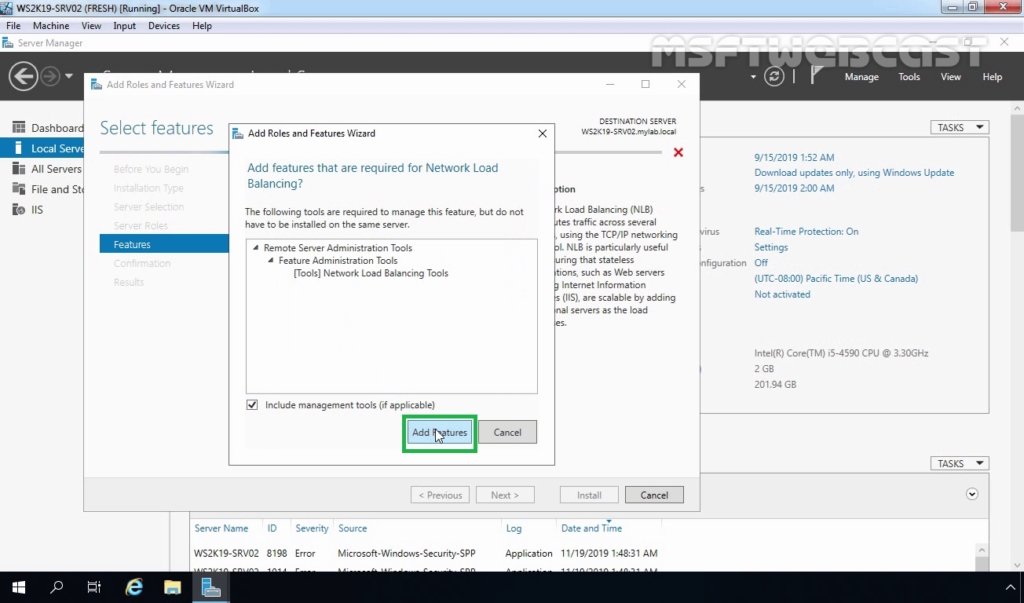
7. A new window will popular up, click on Add Features to include required features and management tools for Network Local Balancing piece of work properly.
8. Make certain that NLB characteristic is selected. Click Next.

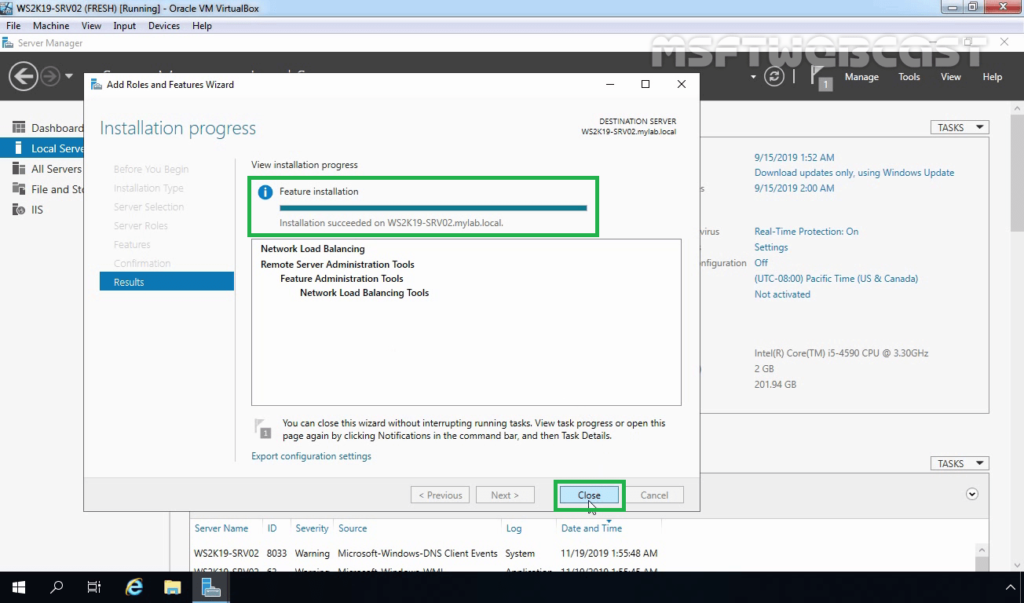
nine. Click on the Install button to start the installation process.

x. Click on Shut.
Reminder: Nosotros demand to perform the same steps to install the NLB feature on the WS2K19-SRV03 member server.
Later installing the NLB feature, the adjacent step is to create the NLB cluster using windows server 2019. To perform these steps, we need to open the Network Load Balancing Manager on one of the NLB nodes.
Configure NLB Cluster in Windows Server 2019:
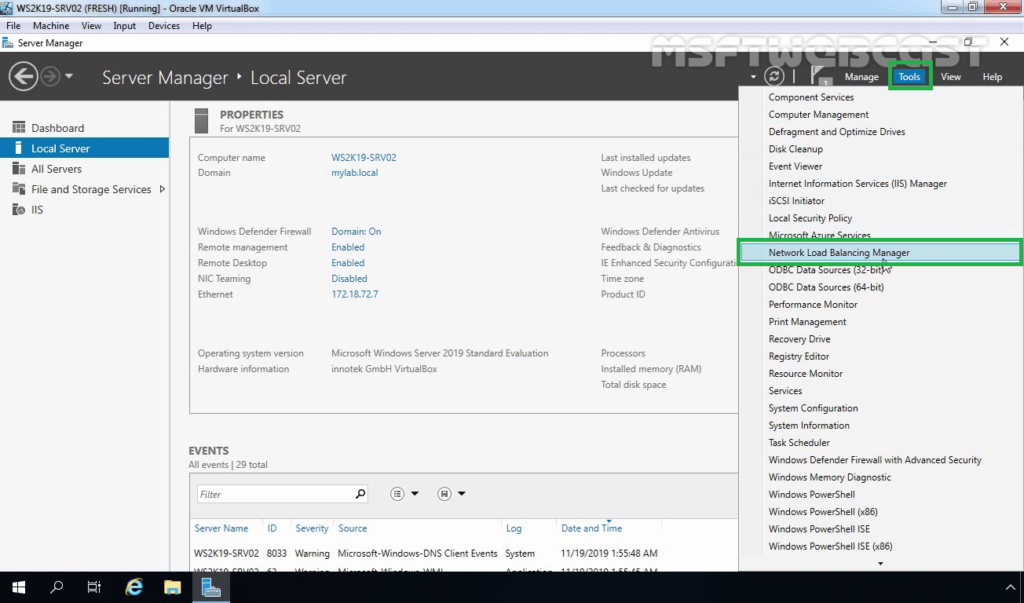
11. On the Server Manager console of the WS2K19-SRV02 member server, click Tools and select Network Load Balancing Manager.
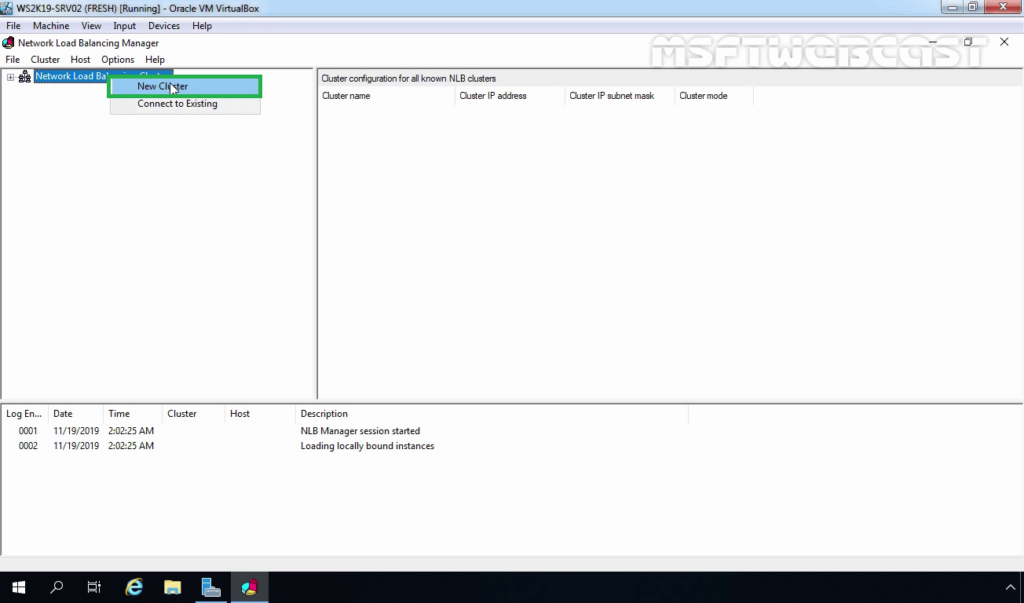
12. Select and right-click Network Load Balancing Clusters and and then click New Cluster.
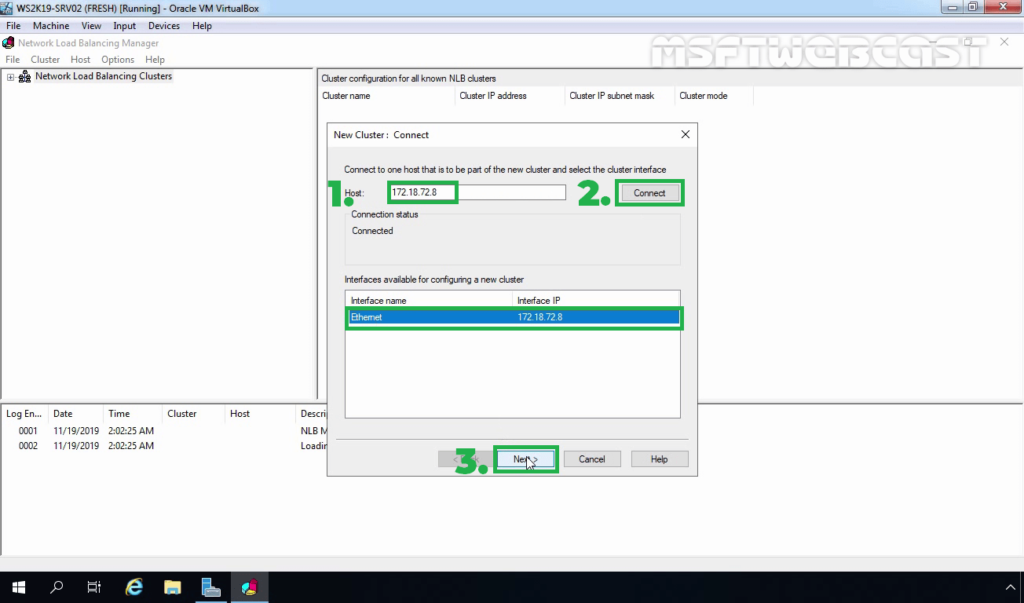
13. Type the IP address or proper noun of the second member server in the Host field and and so click Connect. Verify that the Interface proper name is listed and then proceed to next.
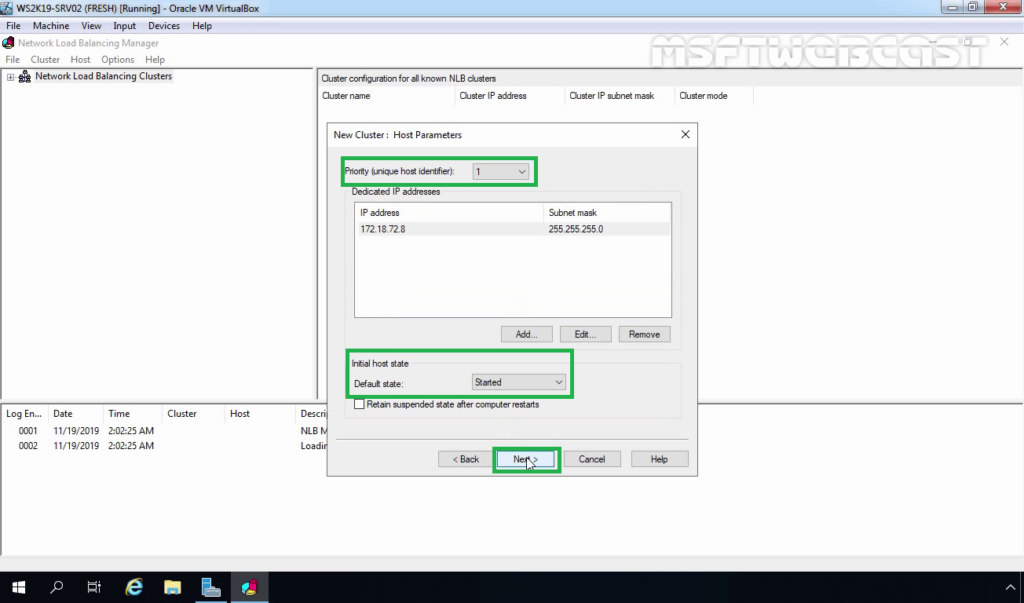
fourteen. On the New Cluster: Host Parameters folio, adjust the priority value as per requirement. Also, ensure that the default condition has gear up equally Started. When you are ready, click on Next.
15. On the New Cluster: Cluster IP Addresses page, click Add to add a new Cluster IP accost.
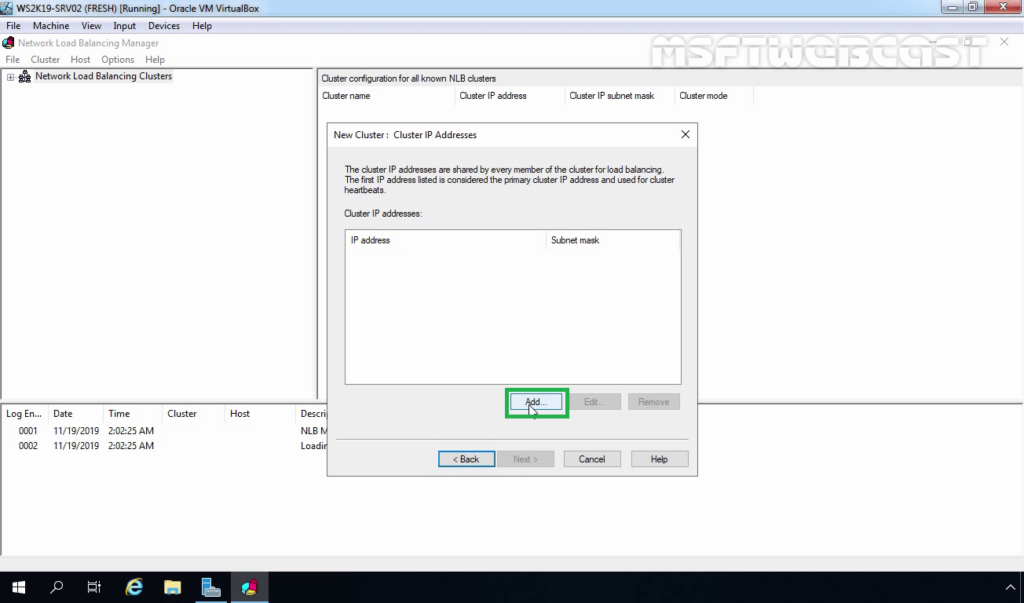
16. Specify a Cluster IP Accost, and click OK.
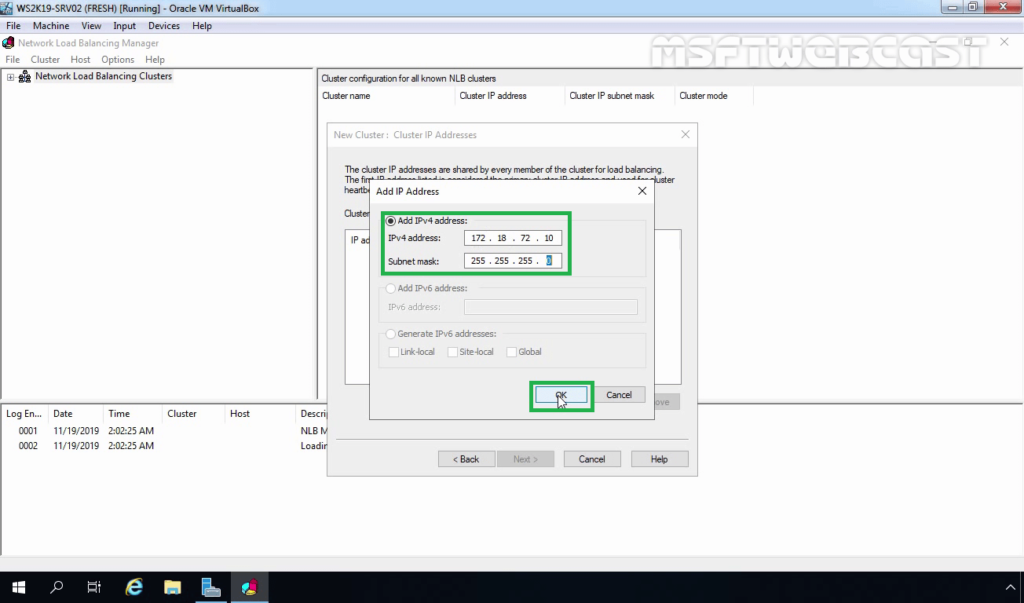
Notation: This IP address is a new NLB Cluster virtual IP address on which the host service will run.
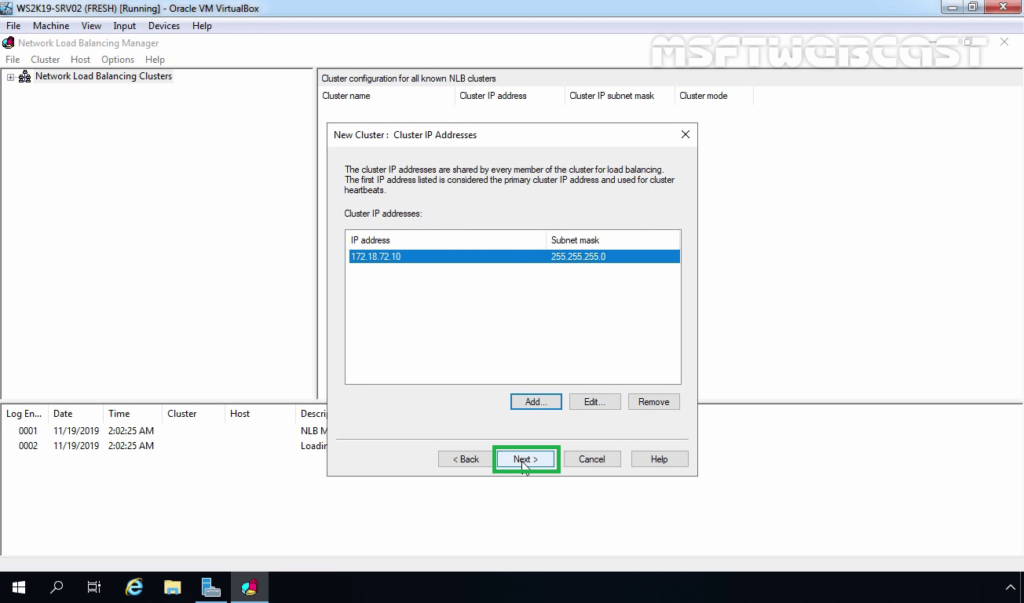
17. If required, you tin can add more than than one IP address by performing the same steps. Click Adjacent.
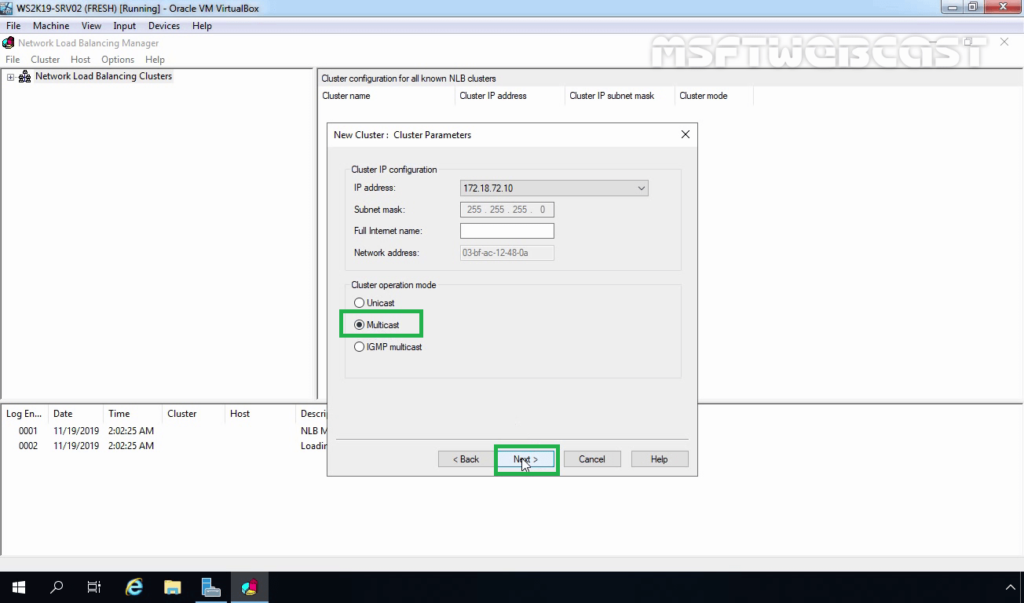
18. Select an NLB cluster functioning style. You can likewise specify the FQDN proper noun for the NLB cluster in the Full Internet name field. Click Next.
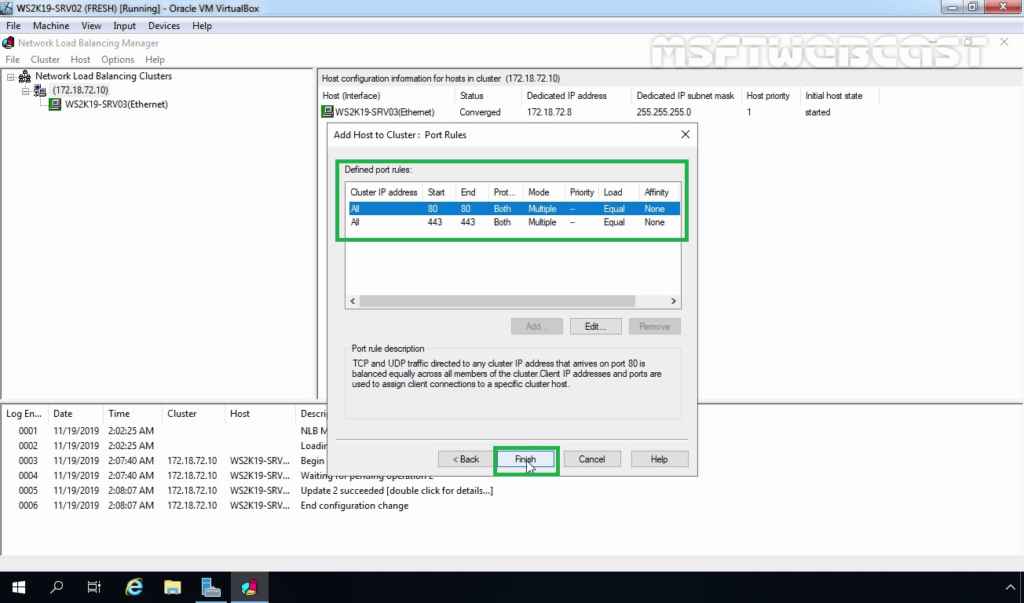
19. On the New Cluster: Port Rules page, select the existing port rule and click on edit.

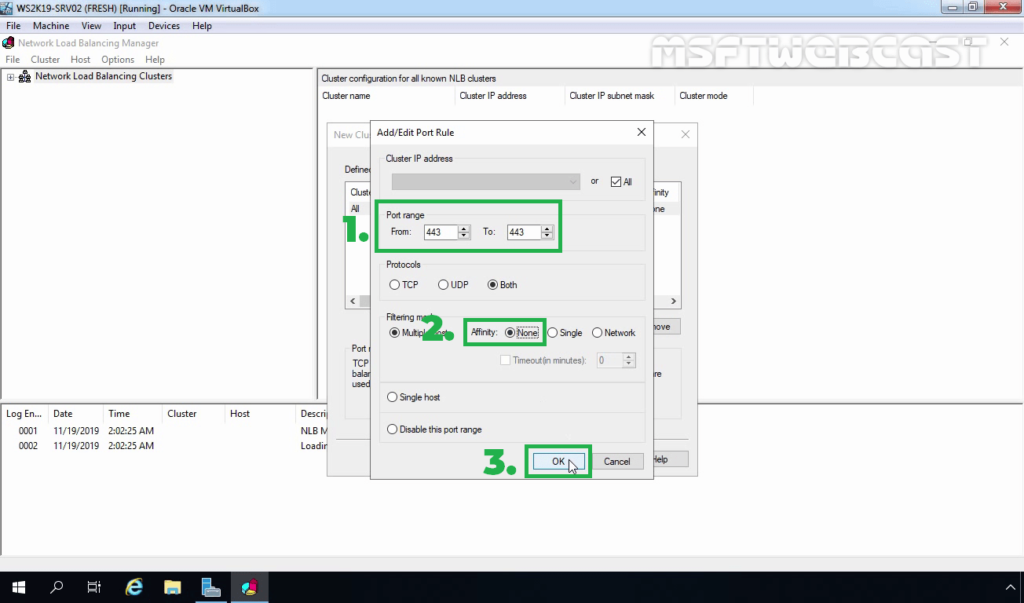
20. Type port range. From eighty to 80 (As we but want port number eighty for IIS NLB cluster). Select Affinity mode to none. Click OK.

21. Click on the Add button to a new rule for port number 443 using the same steps.
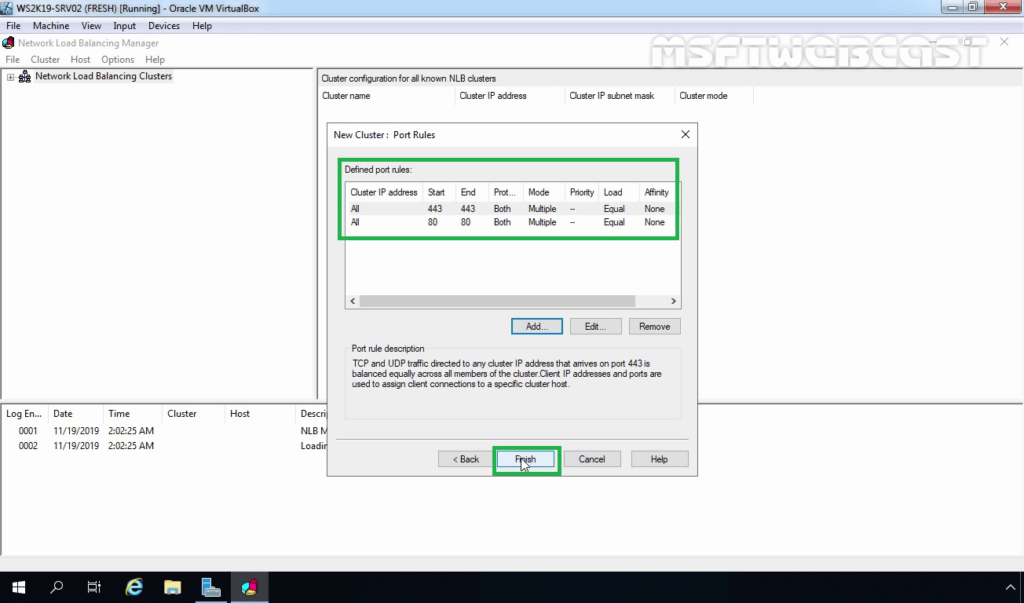
22. Click on Finish.
23. Wait until the WS2K19-SRV03 node is added successfully. The Icon Color of the added NLB node should be displaying green.

Add together 2nd NLB node to an Existing NLB cluster:
24. Right-click on the existing NLB cluster and select Add Host To Cluster.
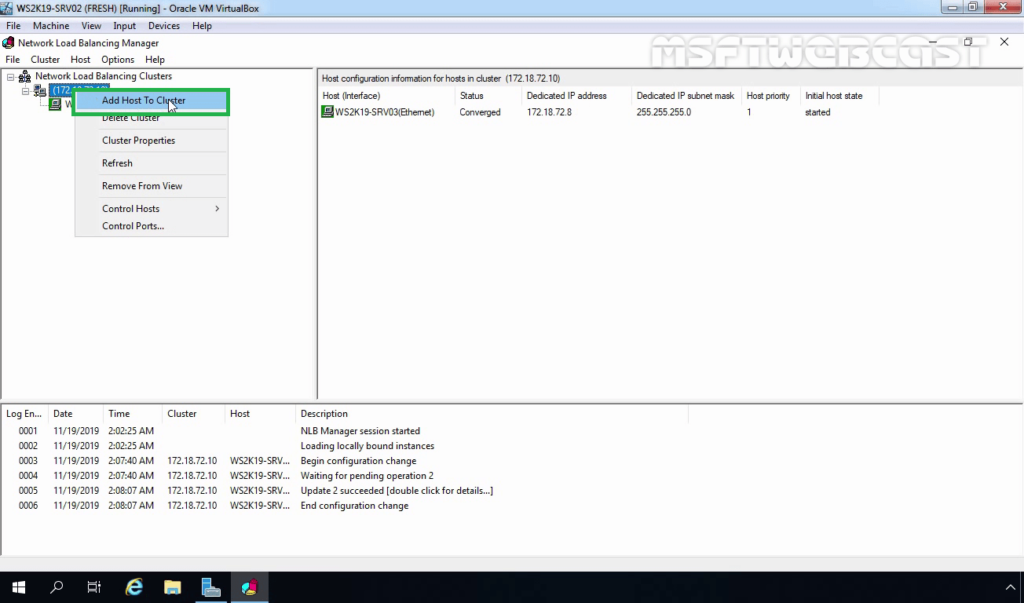
25. Type the WS2K19-SRV02 in the Host field then click Connect. Verify that the Interface name is listed and so proceed to next.

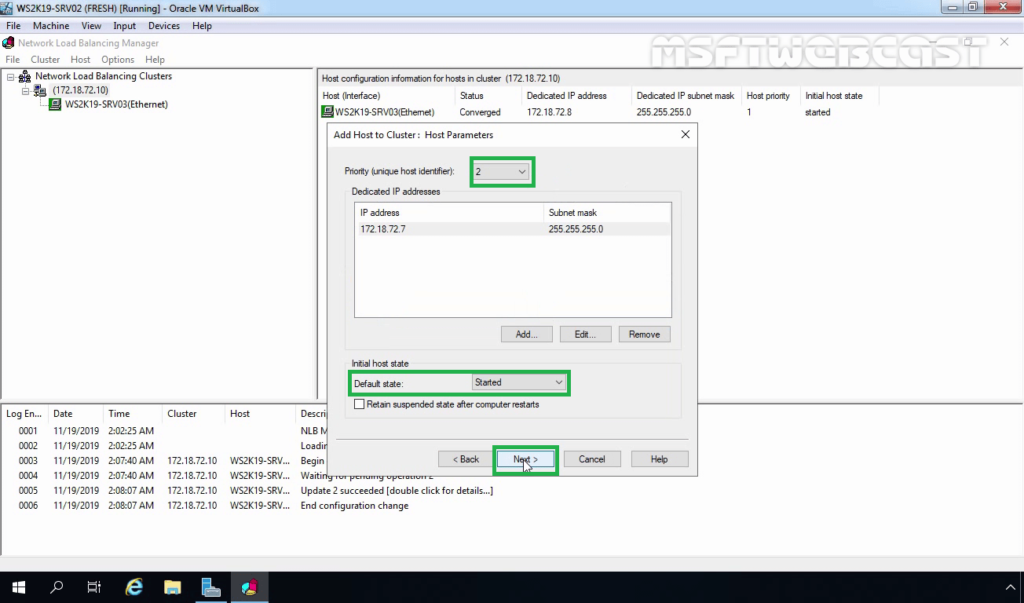
26. On the New Cluster: Host Parameters page, adjust the priority value equally per requirement. Also, ensure that the default status has ready as Started. When you are set, click on Next.
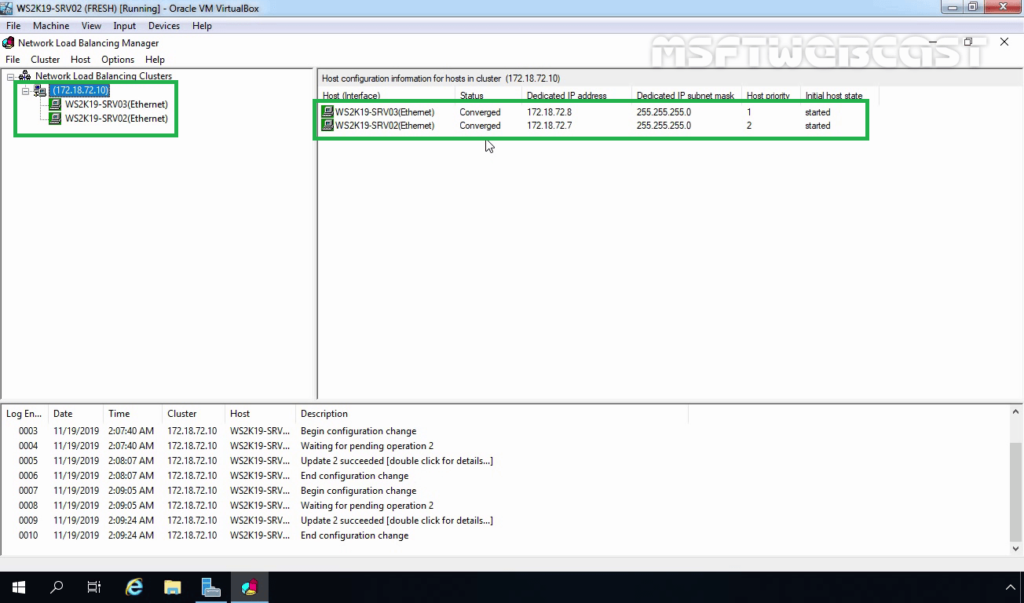
27. Click on Terminate to complete the process of adding the second NLB node to an existing NLB cluster.
28. Verify that the 2nd NLB node is added successfully. The icon color should exist displaying light-green.
Exam the NLB Configuration with Default Web Site:
Already I have installed IIS service on both member servers to test the NLB cluster. Nosotros will access the default website using the NLB cluster IP address.
29. Open a spider web browser. Blazon the NLB cluster IP accost in the address bar.
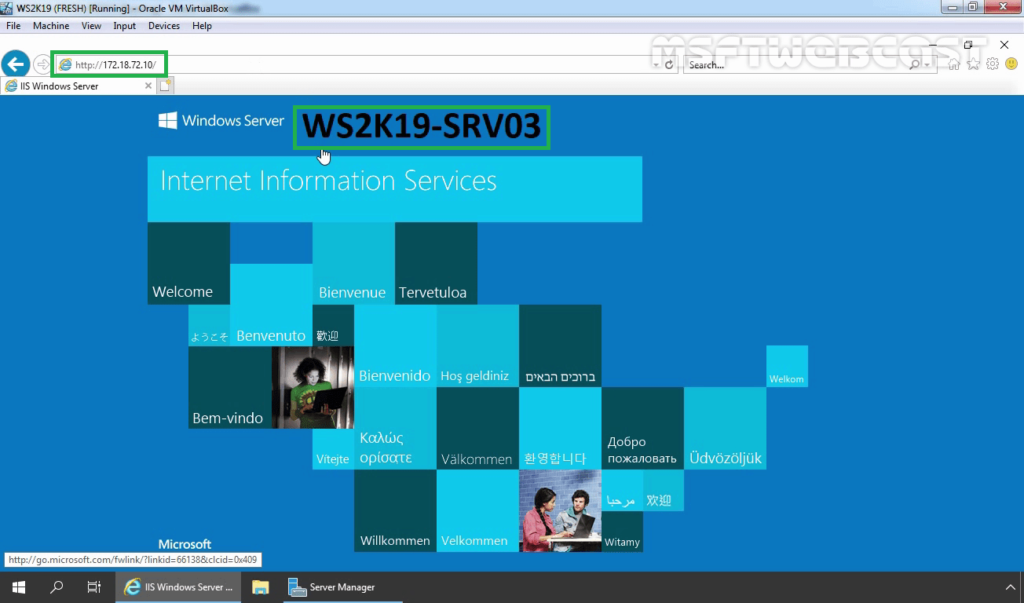
Verify that you can access the Default Website. You are accessing the WS2K19-SRV03 server due to NLB priority 1.
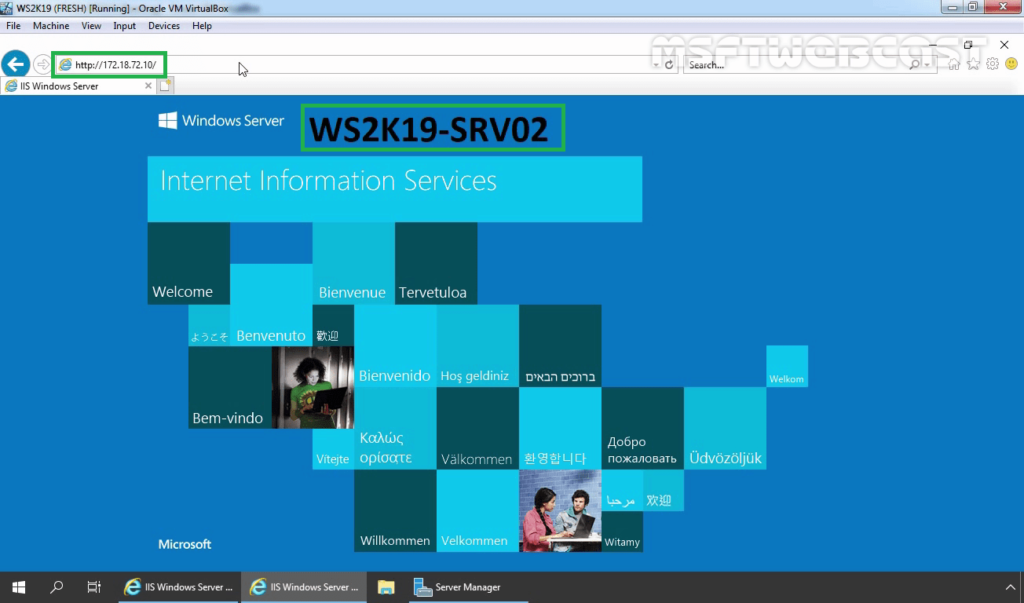
30. Delete web browsing history and again admission the NLB cluster IP address using Net Explorer.
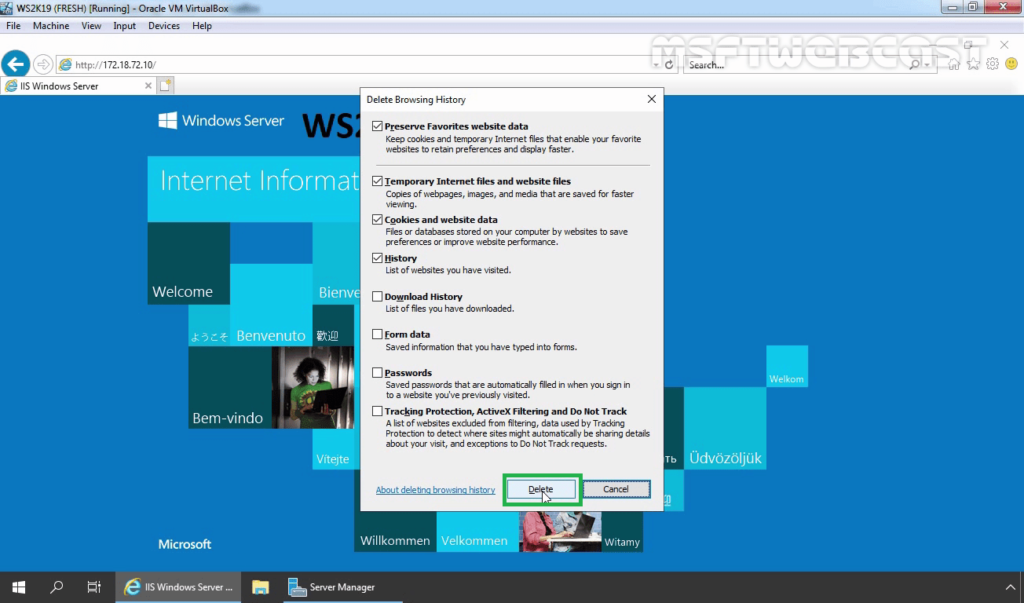
31. This time you are accessing the WS2K19-SRV02 server due to NLB load balancing.
Used this type of configuration when balancing traffic betwixt two IIS servers. The port rules were handling only HTTP (port 80) and HTTPS (port 443) traffic.
That'south it for this guide on How to Install and Configure the Network Load Balancing (NLB) feature in Windows Server 2019. Thank you lot for reading.
Lookout man Video on How to Install and Configure NLB in Windows Server 2019:
Source: https://msftwebcast.com/2020/02/configure-network-load-balancing-in-windows-server-2019.html
Posted by: tanwhistalcup.blogspot.com
0 Response to "How To Configure Load Balancer In Windows Server 2016"
Post a Comment