The Raspberry Pi has become a cornerstone of the maker movement having constitute its widespread popularity among a strong community of hobbyists and professional engineers. Its flexible hardware and open software have challenged the electronics industry to adopt accessibility over convolution where many organisations at present design their products and services around the platform.
The virtually notable of which is Microsoft, who have gone so far as to develop a light version of their Windows x operating system for Raspberry Pi in the interest of building IoT infrastructure through their Azure deject services. Windows 10 IoT Cadre is a season of Windows optimised for pocket-size devices and designed to streamline workflow using the Microsoft evolution environment.
This new improver to the already expansive Windows framework presents an splendid opportunity to explore the applications of the Raspberry Pi equally a serious IoT edge device. This commodity will explore how to set up the Windows x IoT Core operating system on the Raspberry Pi with the eventual goal of connecting information technology to Microsoft Azure deject services in a later article.
You volition need
- Raspberry Pi 2 or 3
- 16GB grade 10 micro-SD card
- Micro USB cablevision
- HDMI Cable
- Copy of Windows 10 IoT (see below for a download link)
Installing Windows
The first footstep when installing our operating organization to the Raspberry Pi is to flash our SD carte with the image file containing the Windows ten IoT Core operating organization. This can be done manually, as is normally done with Raspbian, only in this example, we tin can download and utilize the dedicated IoT Cadre Dashboard to prepare and configure our Raspberry Pi all nether one roof.
Download and Install the Windows ten IoT Core Dashboard
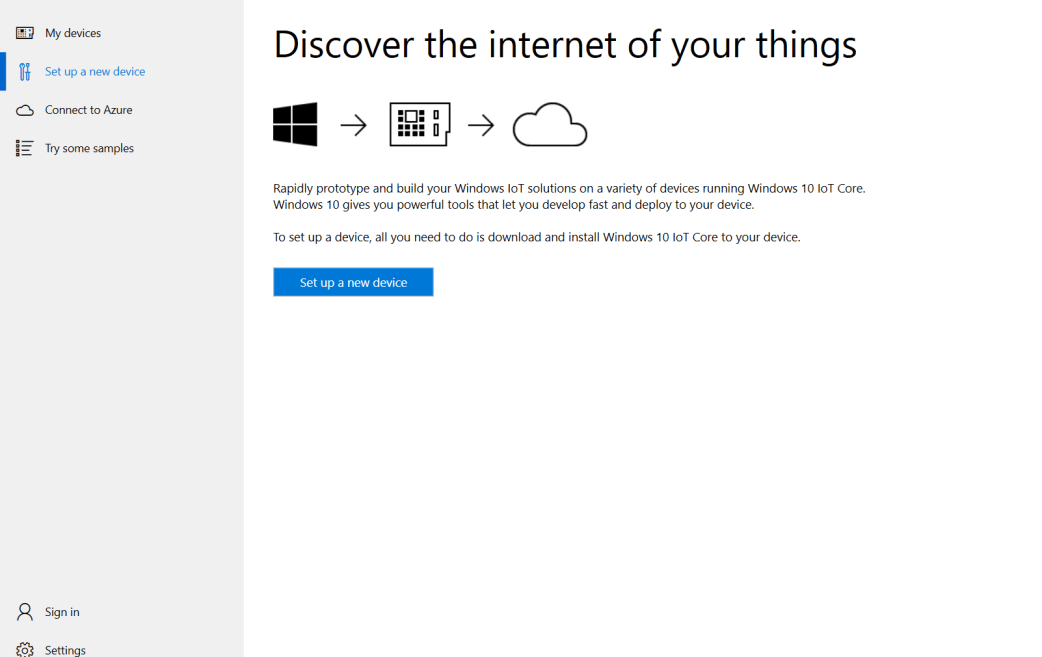
Open up the dashboard program one time installed and click the "ready a new device" button to first configuring the operating arrangement image file. Then think to plug your SD card into your estimator fix for the next step.
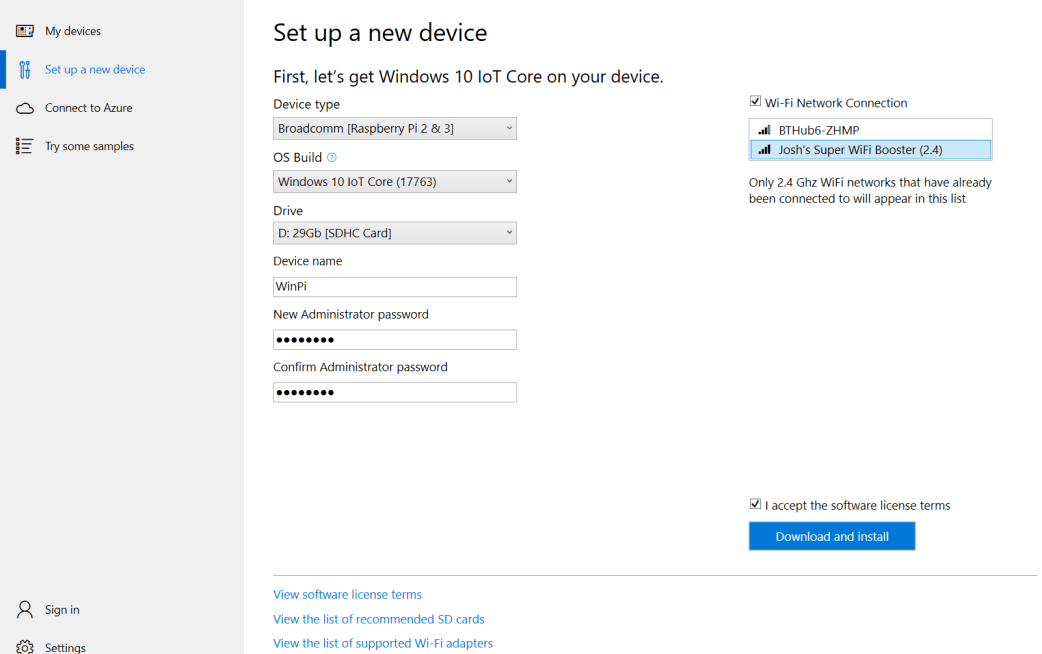
We need to configure our operating system in the dashboard before downloading it and flashing our SD bill of fare. To do this, select the Raspberry Pi device type from the first drop-down menu, and so select the default option in the Bone Build box. Finally, choose the drive letter that contains your blank SD card.
At the correct of the screen, you can choose to select an existing Wi-Fi network for your Raspberry Pi to connect to on kick, you lot can and so use the same network to configure your device remotely using the dashboard. This characteristic can also be disabled if a wired LAN connexion is preferred.
Finally, give your device a name and countersign, have the licence agreement and click then click the download button to format your SD bill of fare for your Raspberry Pi.
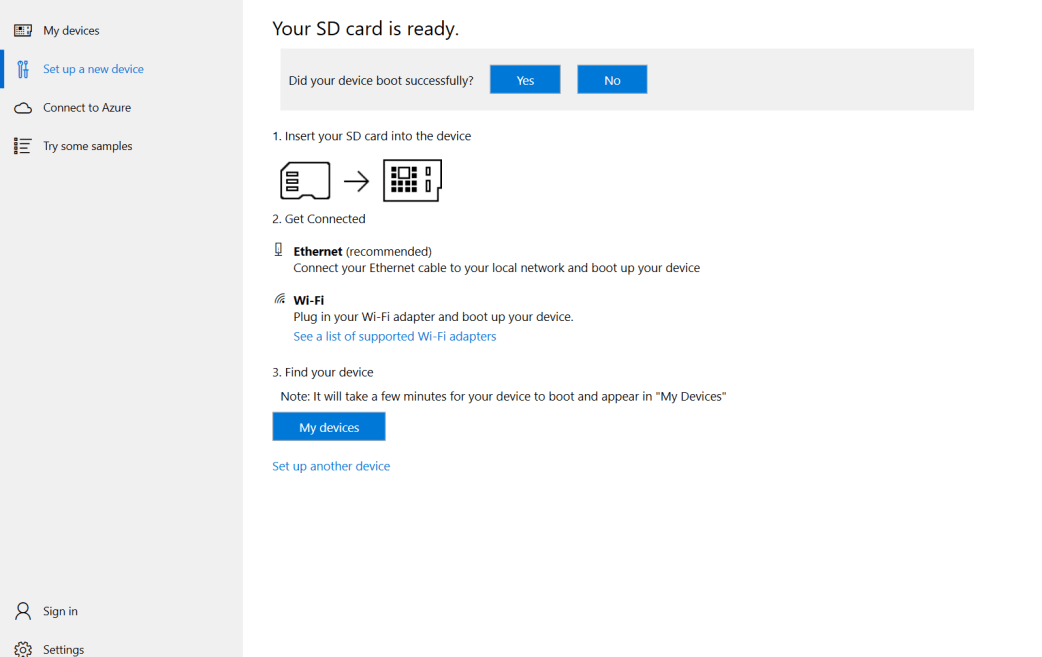
Once your SD card is ready, ignore whatever formatting prompts from Windows and safely remove the card from its socket. Insert the SD card into the Raspberry Pi, use the USB cablevision to power the device and wait five minutes for it to kick the commencement time. Once complete, click on the "my devices" tab on the dashboard to search for your Raspberry Pi on the network.
At this signal, you lot can plug an HDMI cable into your Raspberry Pi and view the boot progress on an external monitor. Information technology is fantastic to see Windows 10 running on a Raspberry Pi!
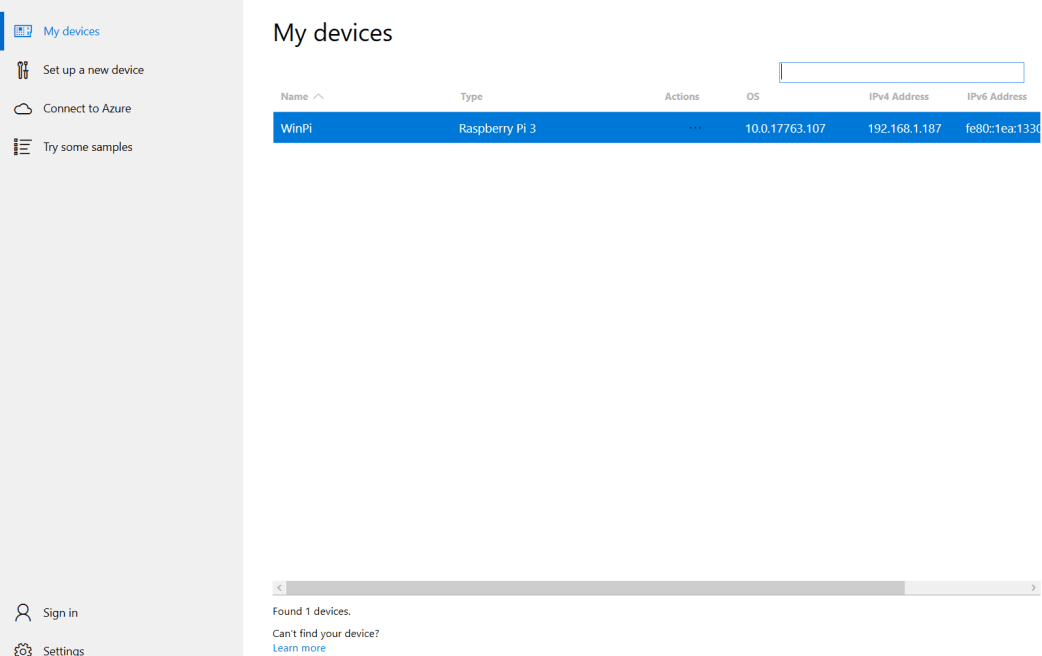
Using the "my devices" tab, confirm that the Raspberry Pi has booted successfully and is connected to the network. Please note that the device may restart several times as part of its get-go boot, causing inconsistencies in the list. If no device appears subsequently 5 minutes, consider checking that y'all are connected to the same network as the device or connect to it directly using an ethernet cable instead.
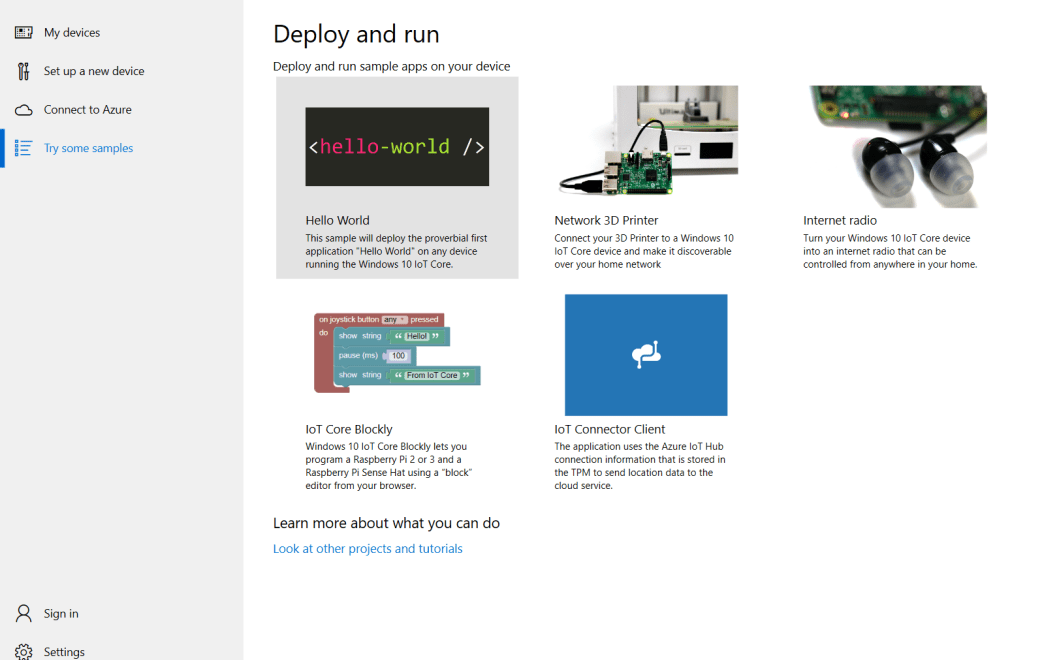
One time we have successfully constitute our device on the network, we can brainstorm to test its operation using some sample lawmaking. Typically, we would develop our Windows apps in Visual Studio but the dashboard also provides a range of precompiled sample lawmaking to save united states some time. Click the "try some samples" tab to show the available pre-compiled projects and select the "hullo earth" app.
Visual studio is typically at the centre of the Microsoft software surround and will become familiar when developing Windows apps. It is a very flexible platform that supports many languages using a compatible code construction. Microsoft also supports the use of its MakeCode visual linguistic communication for IoT Cadre programming, a Scratch alternative that can be used with Microbit and Minecraft.
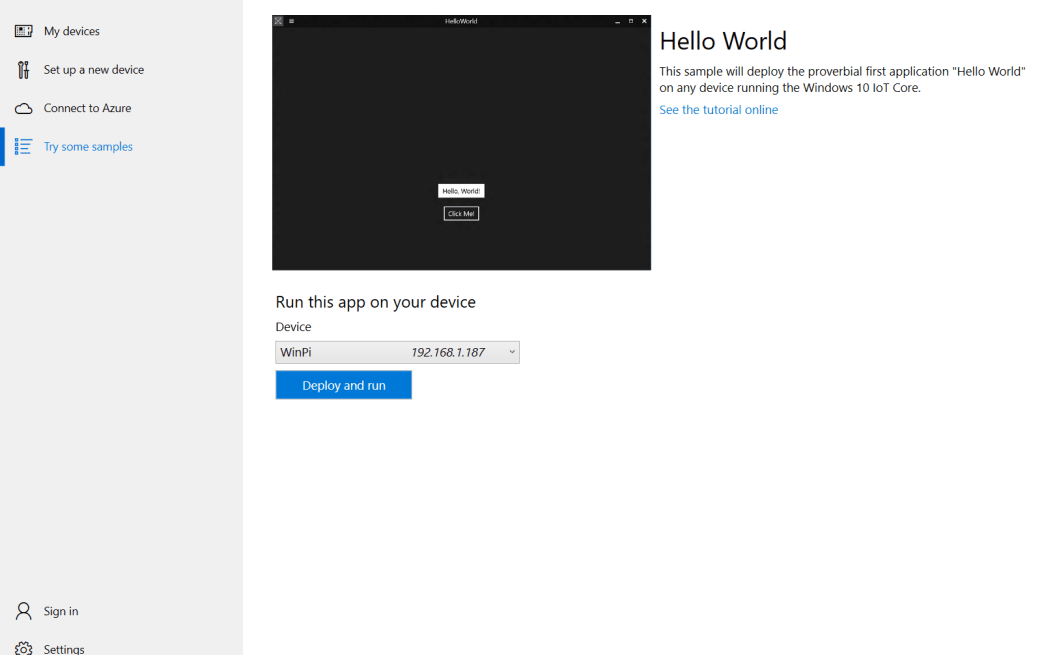
The last thing left to do is to run the obligatory hello world app by selecting your device in the drop-downwards card and pressing the "deploy and run" button. Connect an external monitor to the Raspberry Pi to view the result. Congratulations you take just run your start Windows 10 app on a Raspberry Pi!
In a futurity article, we will attempt to connect our new Windows 10 IoT Core device to the cloud and accept a first expect at using Microsoft Azure deject services to create our own IoT infrastructure project.


0 Response to "How To Install Windows 10 On A Raspberry Pi 3"
Post a Comment